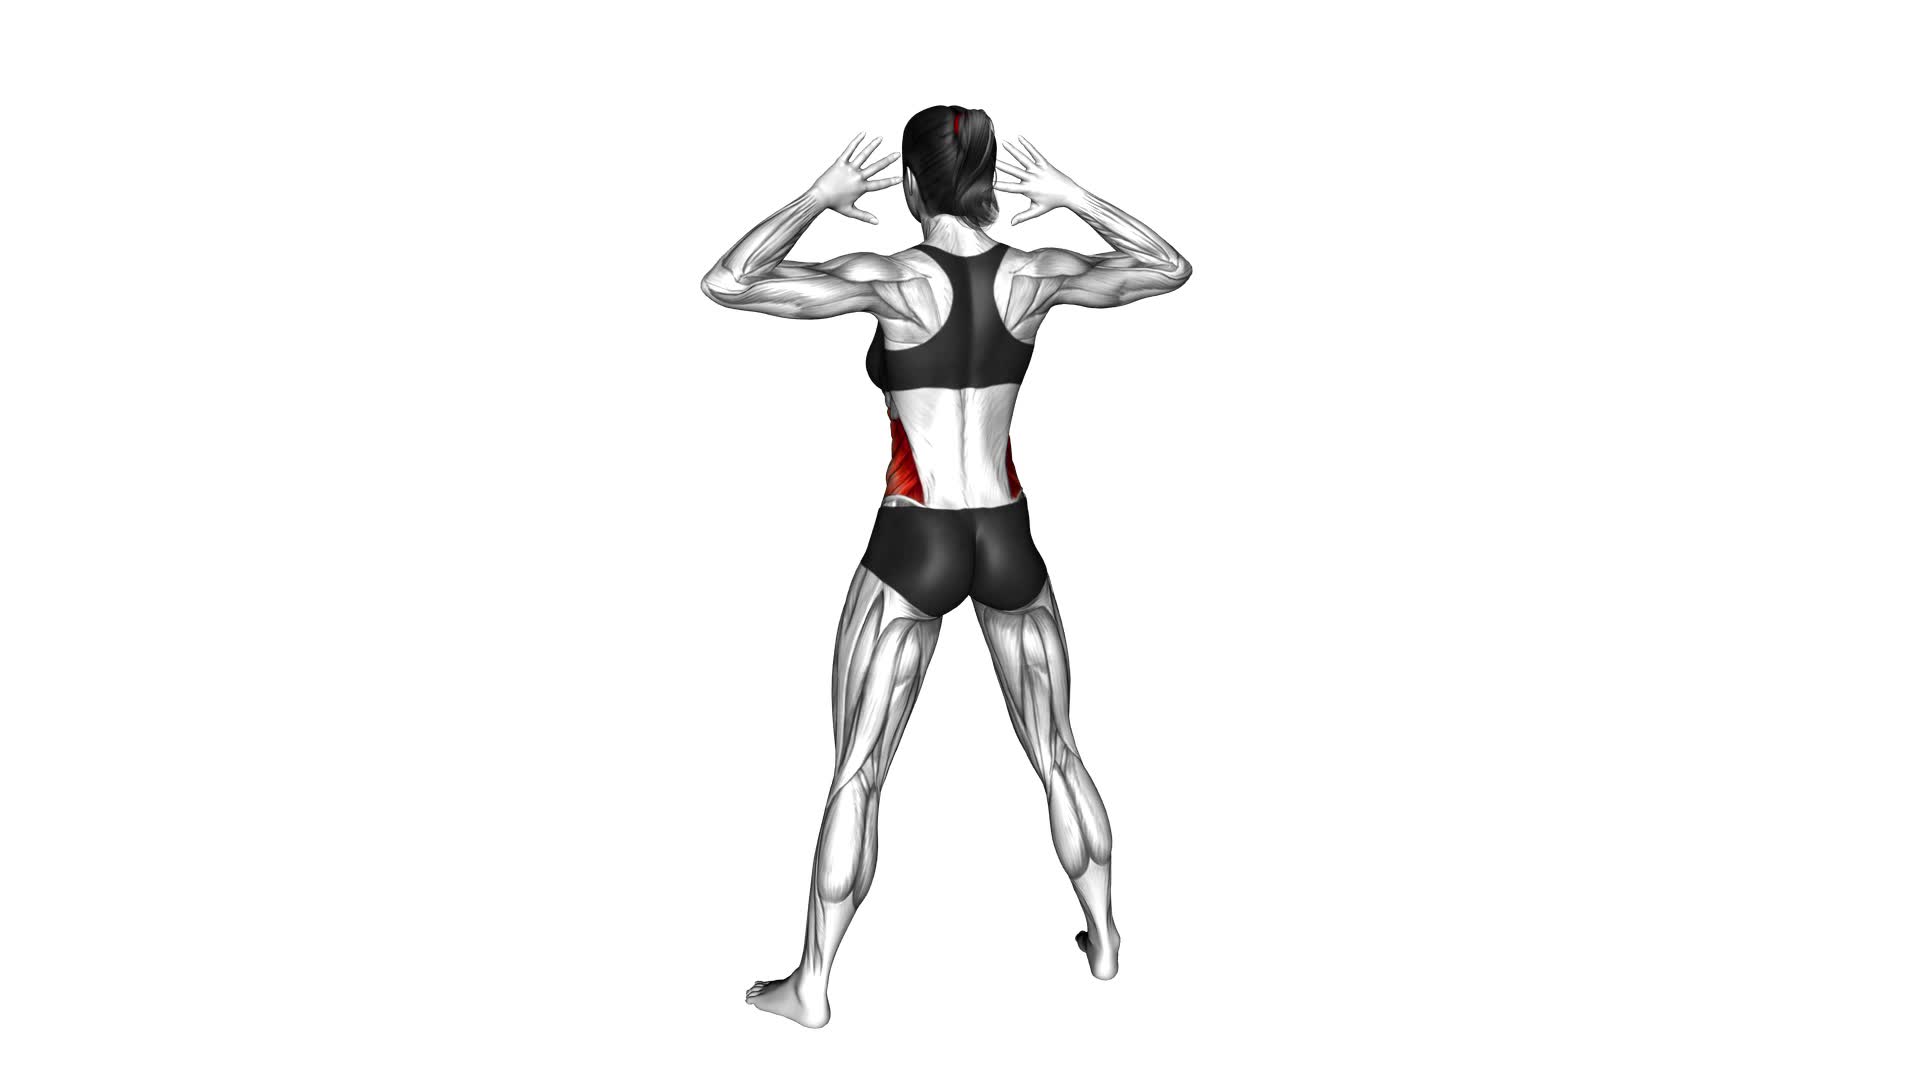
Ear to Knee Side Bend (female) – Video Exercise Guide & Tips

Get ready to tone and strengthen your body with the Ear to Knee Side Bend exercise.
Watch This Exercise Video
In this video exercise guide, we'll show you how to properly perform this movement to target your core and improve flexibility.
Whether you're a beginner or an advanced practitioner, we have modifications and tips to help you get the most out of this exercise.
Let's dive in and start working towards a stronger, more flexible you.
Key Takeaways
- The Ear to Knee Side Bend targets oblique muscles for a more defined waistline.
- It improves flexibility and range of motion in the torso.
- Engaging back and shoulder muscles enhances posture.
- Variations can be used to target different muscle groups.
Benefits of the Ear to Knee Side Bend
You can experience various benefits from performing the Ear to Knee Side Bend exercise. This exercise primarily targets your oblique muscles, which are located on the sides of your abdomen. By engaging these muscles, you can strengthen and tone them, leading to a more defined waistline.
Additionally, the Ear to Knee Side Bend helps improve your overall flexibility and range of motion in your torso. This can be particularly beneficial for activities that require twisting or bending, such as golf or tennis.
Another benefit of this exercise is that it can help improve your posture. As you perform the side bend motion, you engage the muscles in your back and shoulders, which can help counteract the effects of sitting or standing for long periods.
Furthermore, the Ear to Knee Side Bend exercise offers variations that allow you to target different muscle groups. For example, by using dumbbells or a resistance band, you can increase the resistance and challenge your muscles further.
Now that you understand the benefits of the Ear to Knee Side Bend, let's move on to discussing the proper form and technique for this exercise.
Proper Form and Technique for the Exercise
To perform the Ear to Knee Side Bend exercise correctly, maintain proper form and technique throughout the movement. This exercise is often misunderstood, so it's important to address some common misconceptions.
First, make sure to keep your back straight and engage your core muscles throughout the exercise. Avoid rounding your back or hunching over, as this can put strain on your spine. Instead, focus on maintaining a neutral spine position.
Another misconception is that you need to touch your ear to your knee. While the name suggests this, it's not necessary to achieve full range of motion. Instead, focus on the lateral bending of your torso towards your knee while keeping your upper body aligned. As you bend to the side, avoid collapsing or leaning forward. Keep your chest open and your shoulder blades engaged.
Variations and progressions of the Ear to Knee Side Bend exercise can be incorporated to challenge your muscles further. You can add resistance by holding dumbbells or a kettlebell in your hand while performing the exercise. Another variation is to perform the exercise on an unstable surface like a balance board or a BOSU ball. These variations will engage more muscles to improve stability and core strength.
Modifications for Beginners and Advanced Practitioners
For beginners and advanced practitioners, modifying the Ear to Knee Side Bend exercise can help tailor the intensity to your fitness level and goals. Here are three modifications you can try:
- Beginner modifications:
- Start with a smaller range of motion: Instead of aiming to touch your ear to your knee, focus on bringing your shoulder towards your knee while maintaining proper form.
- Use a support: If you find it challenging to balance, place your hand on a wall or chair for stability. This can help you maintain proper alignment throughout the exercise.
- Decrease the number of repetitions: Begin with a lower number of repetitions, gradually increasing as your strength and flexibility improve.
- Advanced modifications:
- Increase the range of motion: As you become more comfortable with the exercise, aim to touch your ear to your knee while maintaining proper form and alignment.
- Add resistance: Hold a dumbbell or resistance band in your hand while performing the exercise. This will increase the challenge and engage your muscles more effectively.
- Increase the number of repetitions or sets: Once you have mastered the exercise, you can gradually increase the number of repetitions or sets to continue challenging yourself.
Common Mistakes to Avoid During the Exercise
Continuing with the modifications for beginners and advanced practitioners, what're some common mistakes to avoid during the Ear to Knee Side Bend exercise? Paying attention to proper alignment is crucial to maximize the effectiveness of this exercise and prevent injury. One common mistake is rounding your back as you bend towards your knee. This can strain your lower back and compromise the effectiveness of the stretch. Instead, focus on maintaining a straight spine and hinging at your hips.
Another common mistake is allowing your knee to collapse inward during the movement. This can put unnecessary stress on your knee joint and lead to discomfort or injury. To avoid this, consciously engage your core and keep your knee aligned with your toes throughout the exercise.
Furthermore, avoid using momentum to complete the movement. Jerky or uncontrolled movements can increase the risk of injury and diminish the effectiveness of the exercise. Instead, perform the side bend with controlled and deliberate movements, focusing on engaging the target muscles.
By avoiding these common mistakes and maintaining proper alignment, you can maximize the effectiveness of the Ear to Knee Side Bend exercise.
Now, let's move on to some tips for further enhancing the benefits of this exercise.
Tips for Maximizing the Effectiveness of the Ear to Knee Side Bend
To maximize the effectiveness of the Ear to Knee Side Bend exercise, you can incorporate these tips into your routine:
- Focus on proper form: Make sure to maintain a straight line from your head to your knee throughout the movement. Keep your core engaged and avoid rounding your back. This will ensure that you're targeting the correct muscles and maximizing results.
- Try different variations: To challenge your body and prevent plateaus, incorporate variations of the Ear to Knee Side Bend into your routine. You can use different equipment, such as dumbbells or resistance bands, to add resistance and increase the intensity of the exercise. Additionally, you can perform the exercise on an unstable surface, like a stability ball, to engage your core even more.
- Progress steadily: As you become more comfortable with the exercise, gradually increase the difficulty by adding more repetitions, sets, or weight. Progression is key to continue challenging your muscles and maximizing results. However, be mindful of your body's limitations and always listen to your body to avoid injuries.
Frequently Asked Questions
How Many Sets and Reps Should I Do for the Ear to Knee Side Bend Exercise?
You should aim for 3 sets of 10-12 reps for the ear to knee side bend exercise. This will help target your oblique muscles and improve flexibility.
If you're a beginner, you can start with fewer reps and gradually increase as you get stronger. Remember to listen to your body and make any necessary modifications to ensure proper form and prevent injury.
Can the Ear to Knee Side Bend Exercise Help With Reducing Belly Fat?
The ear to knee side bend exercise can be effective for overall weight loss. It targets the abdominal muscles and can contribute to reducing belly fat.
While it's a great exercise, it's important to note that no single exercise can solely target belly fat.
It's recommended to combine the ear to knee side bend with other abdominal workouts and a healthy diet for optimal results.
Is It Normal to Feel a Stretch in the Lower Back While Performing the Ear to Knee Side Bend?
When performing the ear to knee side bend exercise, it's normal to feel a stretch in your lower back. This is because the exercise targets the oblique muscles, which are located on the sides of your abdomen and lower back.
To ensure proper form, make sure to keep your core engaged and your back straight. For beginners, you can modify the exercise by reducing the range of motion and gradually increasing it as you get stronger.
Can I Do the Ear to Knee Side Bend Exercise if I Have a History of Lower Back Pain?
If you have a history of lower back pain, it's important to be cautious when considering the ear to knee side bend exercise. Before attempting it, consult with a healthcare professional or a certified trainer who can assess your condition and provide alternative exercises that may be more suitable for you.
Proper form and technique are crucial in avoiding further strain or injury to your lower back. Always prioritize your safety and well-being during any exercise routine.
How Long Should I Hold the Stretch at the Bottom Position of the Ear to Knee Side Bend Exercise?
To maximize the benefits of the ear to knee side bend exercise, it's important to hold the stretch at the bottom position for about 15-30 seconds. This helps to improve flexibility and increase the range of motion in your lower back and hamstrings.
If you're a beginner or have lower back pain, you can modify the exercise by bending your knees slightly or using a chair for support.
Incorporating this exercise into your daily routine can help improve posture and reduce back pain.
Conclusion
In conclusion, the ear to knee side bend is a beneficial exercise that targets the core muscles and improves flexibility. By maintaining proper form and technique, individuals can avoid common mistakes and maximize the effectiveness of this exercise.
Beginners can modify the exercise to suit their fitness level, while advanced practitioners can challenge themselves by increasing the intensity. Remember to listen to your body and consult with a fitness professional if needed.
Stay consistent and enjoy the benefits of this effective exercise.

Author
Years ago, the spark of my life’s passion ignited in my mind the moment I stepped into the local gym for the first time. The inaugural bead of perspiration, the initial endeavor, the very first surge of endorphins, and a sense of pride that washed over me post-workout marked the beginning of my deep-seated interest in strength sports, fitness, and sports nutrition. This very curiosity blossomed rapidly into a profound fascination, propelling me to earn a Master’s degree in Physical Education from the Academy of Physical Education in Krakow, followed by a Sports Manager diploma from the Jagiellonian University. My journey of growth led me to gain more specialized qualifications, such as being a certified personal trainer with a focus on sports dietetics, a lifeguard, and an instructor for wellness and corrective gymnastics. Theoretical knowledge paired seamlessly with practical experience, reinforcing my belief that the transformation of individuals under my guidance was also a reflection of my personal growth. This belief holds true even today. Each day, I strive to push the boundaries and explore new realms. These realms gently elevate me to greater heights. The unique combination of passion for my field and the continuous quest for growth fuels my drive to break new ground.


