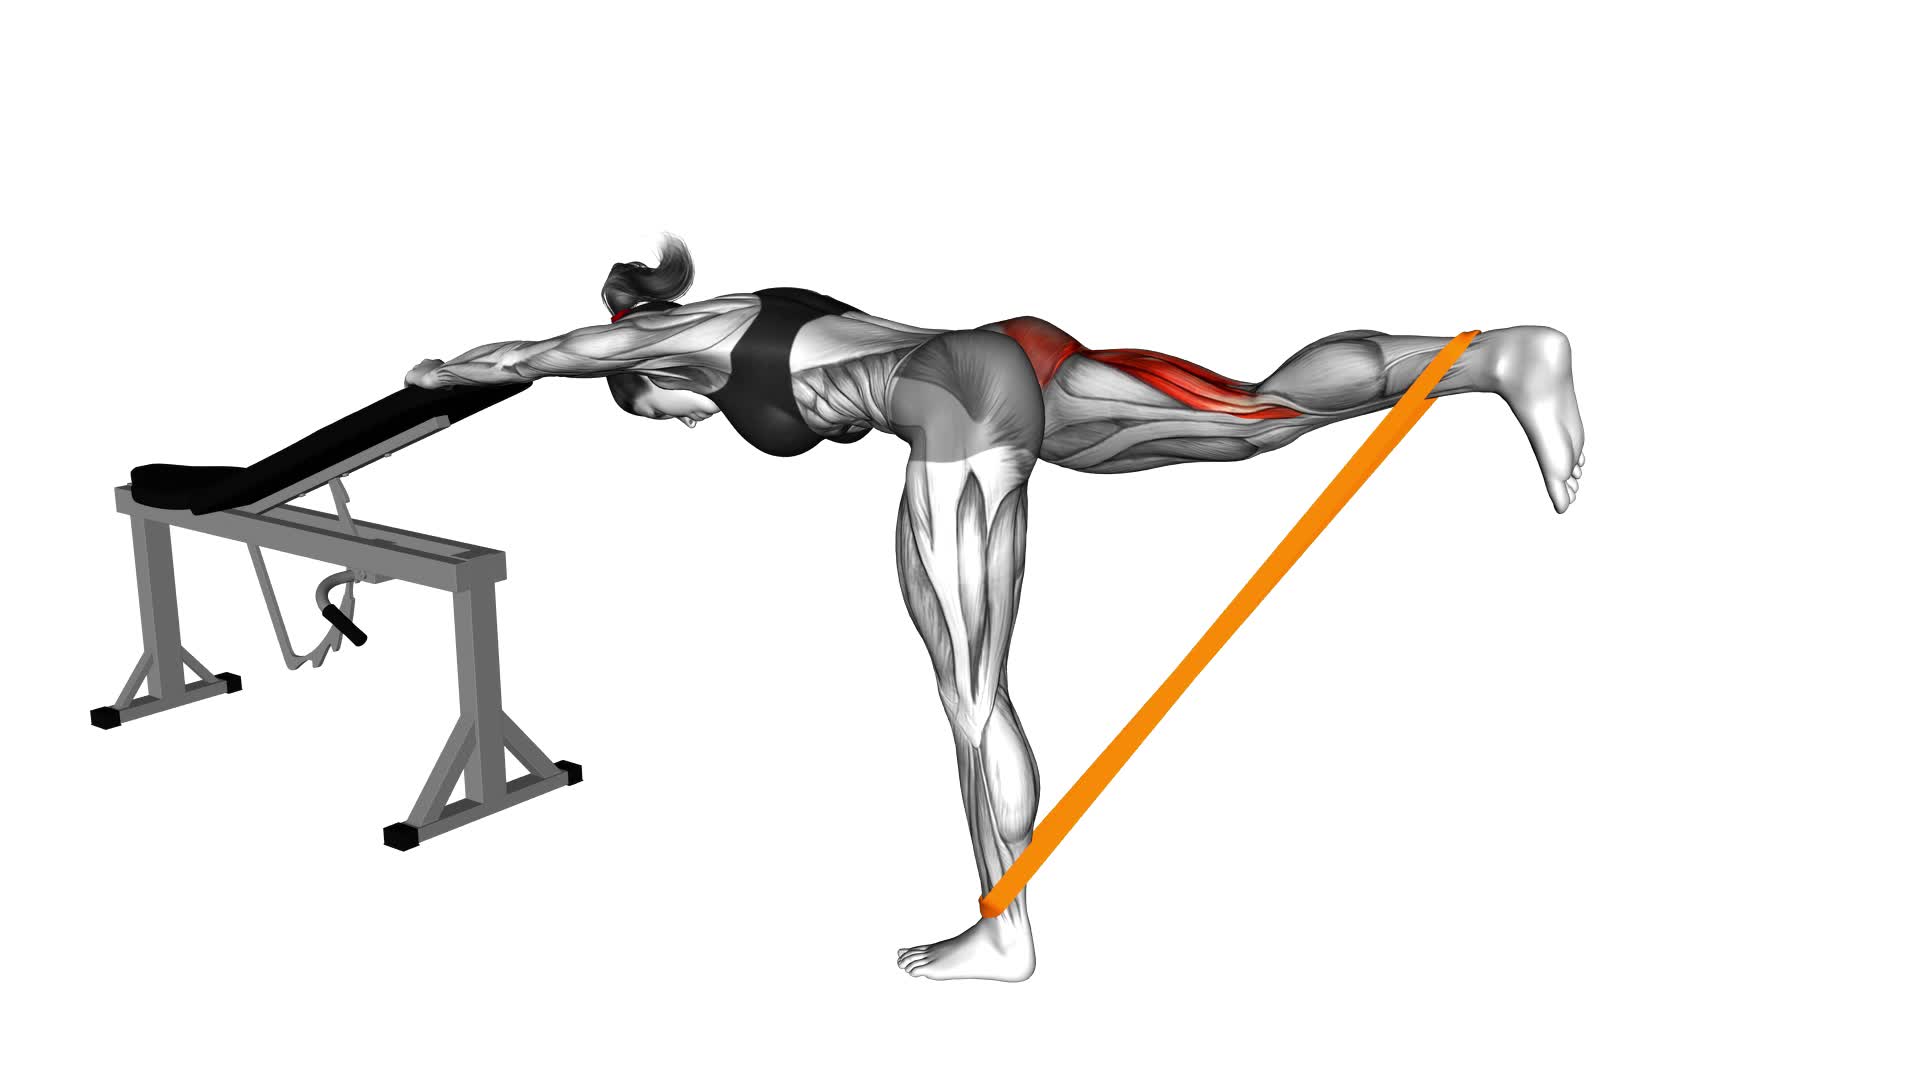
Resistance Band One Leg Kickback (Bent Position) (female) – Video Exercise Guide & Tips

Looking to tone and strengthen your glutes? Try the resistance band one leg kickback!
Watch This Exercise Video
This video exercise guide and tips are here to help you perfect your form and get the most out of this targeted workout.
With the right resistance band and proper technique, you'll be on your way to achieving the results you desire.
Say goodbye to common mistakes and hello to variations and modifications that suit your fitness level.
Let's get started!
Key Takeaways
- Resistance band one leg kickback is a highly effective exercise for strengthening and toning the glutes and hamstrings.
- Proper form and technique, including avoiding common mistakes like using momentum or arching the back, is crucial for optimal effectiveness.
- Maintaining a stable core and avoiding imbalances and potential injuries are important during the exercise.
- Choosing the right resistance band based on fitness goals and current strength is essential for maximizing muscle engagement and avoiding strain or injury.
Benefits of Resistance Band One Leg Kickback
You will experience significant strengthening and toning of your glutes and hamstrings with the Resistance Band One Leg Kickback exercise. This exercise is highly effective in targeting these muscle groups, helping you achieve a more sculpted and defined lower body.
Proper alignment is crucial when performing the Resistance Band One Leg Kickback. Start by attaching the resistance band to a sturdy anchor point. Stand facing the anchor point with your feet hip-width apart. Keep your core engaged and maintain a slight bend in your supporting leg.
To activate your muscles correctly, begin by shifting your weight onto your supporting leg. Keep your upper body stable and hinge forward at the hips. Extend your working leg straight back behind you as far as possible, while keeping your hips square and your knee slightly bent. Pause for a moment at the top of the movement, then slowly return to the starting position.
Proper Form and Technique
To perform the Resistance Band One Leg Kickback exercise with proper form and technique, there are two important points to keep in mind.
First, it's crucial to avoid common mistakes such as using momentum or arching your back, as these can compromise the effectiveness of the exercise and increase the risk of injury.
Second, to maximize muscle engagement, focus on squeezing your glutes and maintaining control throughout the movement, ensuring that your leg is fully extended and your foot is flexed at the top of the kickback.
Avoiding Common Mistakes
To ensure proper form and technique during the Resistance Band One Leg Kickback (Bent Position) exercise, focus on maintaining a stable core throughout the movement. This is crucial for maximizing effectiveness and injury prevention.
One common mistake to avoid is letting your lower back arch or round during the kickback. This can put unnecessary strain on your spine and decrease the effectiveness of the exercise. Instead, engage your core muscles by pulling your belly button in towards your spine and maintaining a neutral spine position.
Another mistake is using momentum to swing your leg up instead of using your glutes to lift it. This reduces muscle engagement and can lead to imbalances and potential injuries.
Maximizing Muscle Engagement
Focus on maintaining a stable core throughout the Resistance Band One Leg Kickback (Bent Position) exercise to maximize muscle engagement and ensure proper form and technique.
By keeping your core stable, you activate the muscles in your abdomen and lower back, providing a solid foundation for the movement. Engaging your core also helps to prevent any unnecessary strain on your lower back.
As you perform the kickback, focus on squeezing your glutes and hamstrings to maximize muscle activation in those areas. This will enhance the effectiveness of the exercise and increase the intensity of your workout.
Remember to keep your movements controlled and avoid any swinging or jerking motions.
Choosing the Right Resistance Band
When choosing the right resistance band, consider the level of resistance that's suitable for your fitness goals and current strength. Resistance bands are versatile and effective tools for strength training. They come in various levels of resistance, ranging from light to heavy. It's important to choose a resistance band that challenges your muscles without causing strain or injury.
If you're a beginner or have limited strength, start with a lighter resistance band. This will allow you to focus on proper form and technique before progressing to higher resistance levels. On the other hand, if you're more advanced or have developed significant strength, a heavier resistance band will provide the necessary challenge to continue making progress in your workouts.
It is also important to consider the specific exercises you'll be performing with the resistance band. Some exercises require more resistance than others. For example, exercises that target larger muscle groups such as squats or deadlifts may require a heavier resistance band, while exercises that target smaller muscle groups such as bicep curls or lateral raises may require a lighter resistance band.
Common Mistakes to Avoid
One mistake to avoid is neglecting proper form and technique when performing resistance band exercises. Proper form is essential to ensure maximum muscle engagement and to prevent injuries.
Here are some common mistakes to avoid:
- Using too much tension: It can be tempting to use a resistance band with high tension to make the exercise more challenging. However, using excessive tension can lead to compromised form and reduced muscle engagement. It's important to choose a resistance band that provides enough resistance without sacrificing proper form.
- Relying solely on momentum: Another mistake is relying on momentum rather than controlled movements. When performing a resistance band one leg kickback, it's crucial to focus on the targeted muscle (glutes) and engage it throughout the entire movement. Avoid swinging your leg or using momentum to lift it, as this can reduce the effectiveness of the exercise.
Remember to maintain a stable core, keep your back straight, and focus on controlled movements to effectively engage your muscles during resistance band exercises.
Variations and Modifications
To further personalize your resistance band one leg kickback exercise, you can explore various variations and modifications that suit your fitness level and goals. These variations and modifications allow you to target different muscles and add variety to your workout routine.
One variation you can try is the standing kickback. Instead of being in a bent position, stand upright and loop the resistance band around your ankle. Keeping your core engaged and your back straight, kick your leg back while maintaining control. This variation works your glutes, hamstrings, and lower back.
Another modification is to use a different resistance band. Resistance bands come in different levels of resistance, so you can choose one that challenges you without being too difficult or too easy. If you find that the band you're currently using isn't providing enough resistance, you can switch to a stronger band. On the other hand, if the band is too challenging, you can opt for a lighter resistance.
By exploring these variations and modifications, you can tailor the resistance band one leg kickback exercise to your specific needs and preferences.
Now, let's move on to some tips for maximizing results and getting the most out of this exercise.
Tips for Maximizing Results
To maximize your results with the resistance band one leg kickback exercise, there are a few important points to keep in mind.
First, proper form is crucial for targeting the right muscles and avoiding injury. Make sure to maintain a straight back, engage your core, and focus on squeezing your glutes during the movement.
Secondly, incorporating progressive overload techniques, such as increasing the resistance or repetitions over time, will help to continually challenge your muscles and promote growth.
Lastly, don't forget about the importance of balanced nutrition to support your fitness goals and optimize your results.
Proper Form Importance
Ensure you maintain proper form while performing the resistance band one leg kickback exercise for maximum results. Proper form is crucial for two main reasons: the importance of technique and preventing injuries.
Here's why:
- Technique:
- By using proper form, you engage the correct muscles, ensuring they're targeted effectively.
- It helps you to perform the exercise with the intended range of motion, maximizing the benefits to your glutes and hamstrings.
- Injury prevention:
- Proper form reduces the risk of strain or injury to your muscles, joints, and ligaments.
- It helps maintain stability and balance during the exercise, preventing falls or accidents.
Progressive Overload Techniques
To maximize your results in the resistance band one leg kickback exercise, incorporate progressive overload techniques. Progressive overload is the practice of gradually increasing the demands placed on your muscles over time, allowing for continual strength and muscle growth. This can be achieved by increasing the resistance of the band, performing more repetitions, or adding additional sets.
Overcoming plateaus, which are periods where you may feel like you're not making progress, can be achieved through progressive overload. By consistently challenging your muscles, you can push past these plateaus and continue to see improvements. It's also important to incorporate rest days into your routine to allow your muscles time to recover and repair. This will help prevent injuries and ensure optimal results.
Transitioning into the next section, balanced nutrition is also key in achieving your desired outcomes.
Balanced Nutrition for Results
For optimal results in your resistance band one leg kickback exercise, it's important to maintain a balanced nutrition plan. A balanced diet provides the necessary fuel and nutrients your body needs to perform at its best. To maximize your results, consider the following tips for meal planning:
- Include a variety of fruits and vegetables in your diet to ensure you're getting a wide range of vitamins and minerals.
- Incorporate lean proteins such as chicken, fish, and tofu to support muscle growth and repair.
- Opt for whole grains like brown rice, quinoa, and whole wheat bread to provide sustained energy throughout your workouts.
- Don't forget healthy fats like avocados, nuts, and olive oil, which are essential for hormone production and brain function.
- Stay hydrated by drinking plenty of water throughout the day.
Frequently Asked Questions
How Many Sets and Repetitions Should I Do for the Resistance Band One Leg Kickback Exercise?
To determine how many sets and repetitions you should do for the resistance band one leg kickback exercise, it's important to consider your fitness goals and current fitness level.
Generally, it's recommended to start with 2-3 sets of 12-15 repetitions on each leg. As you progress, you can increase the number of sets and repetitions to challenge your muscles further.
Remember to always listen to your body and adjust the intensity as needed.
Incorporating variations of resistance band exercises can also help target different muscle groups for a well-rounded workout.
Can I Do the Resistance Band One Leg Kickback Exercise if I Have Knee or Hip Problems?
If you have knee or hip problems, it's important to be cautious with exercises that may aggravate them. The resistance band one leg kickback exercise may not be suitable for you in this case.
However, there are alternative exercises you can try that are more gentle on the joints.
Resistance band exercises are beneficial for rehabilitation as they provide resistance to strengthen muscles without putting excessive stress on the joints.
How Long Should I Hold the Kickback Position During the Exercise?
To ensure proper form during the resistance band one leg kickback exercise, it's important to hold the kickback position for about 2-3 seconds. This allows you to engage your glutes and maximize the effectiveness of the exercise.
Beginners can modify this exercise by using a lighter resistance band or starting with a smaller range of motion. Remember to listen to your body and adjust as needed to avoid any discomfort or strain.
Can I Use a Resistance Band of Any Color or Does It Make a Difference?
When it comes to using a resistance band for your one leg kickback exercise, the color of the band doesn't really matter. What's important is the resistance level it provides. Different colors usually indicate different levels of resistance, so choose one that suits your fitness level.
Resistance bands offer various benefits, such as improving strength and flexibility. There are different types of resistance bands available, like loop bands or tube bands, each with its own advantages.
Is It Normal to Feel Soreness in Specific Muscles After Doing the Resistance Band One Leg Kickback Exercise?
Feeling soreness in specific muscles after the resistance band one leg kickback exercise is normal. It means you're effectively targeting and working those muscles.
To enhance the intensity of the exercise, adding ankle weights can be beneficial. This will further challenge your muscles and help you achieve better results.
If you're looking for other exercises that target the same muscles, you can try exercises like donkey kicks, fire hydrants, or glute bridges. These exercises engage similar muscle groups and can complement your resistance band kickback routine.
Conclusion
In conclusion, the resistance band one leg kickback exercise is a highly effective way to strengthen and tone your glutes and hamstrings. By using the proper form and technique, choosing the right resistance band, and avoiding common mistakes, you can maximize your results.
Remember to vary the exercise and make modifications as needed to challenge your muscles. Incorporate these tips into your fitness routine to achieve the best possible outcome.

Author
Years ago, the spark of my life’s passion ignited in my mind the moment I stepped into the local gym for the first time. The inaugural bead of perspiration, the initial endeavor, the very first surge of endorphins, and a sense of pride that washed over me post-workout marked the beginning of my deep-seated interest in strength sports, fitness, and sports nutrition. This very curiosity blossomed rapidly into a profound fascination, propelling me to earn a Master’s degree in Physical Education from the Academy of Physical Education in Krakow, followed by a Sports Manager diploma from the Jagiellonian University. My journey of growth led me to gain more specialized qualifications, such as being a certified personal trainer with a focus on sports dietetics, a lifeguard, and an instructor for wellness and corrective gymnastics. Theoretical knowledge paired seamlessly with practical experience, reinforcing my belief that the transformation of individuals under my guidance was also a reflection of my personal growth. This belief holds true even today. Each day, I strive to push the boundaries and explore new realms. These realms gently elevate me to greater heights. The unique combination of passion for my field and the continuous quest for growth fuels my drive to break new ground.


