Surrender Side Bend (Male) – Video Exercise Guide & Tips

Are you looking to improve your flexibility and strengthen your core? Look no further than the Surrender Side Bend exercise.
Watch This Exercise Video
In this video exercise guide, we'll show you the proper form and technique to perform this move effectively.
With variations and modifications available, you can tailor the exercise to your fitness level.
Avoid common mistakes and get tips on incorporating the Surrender Side Bend into your workout routine.
Get ready to take your fitness to the next level!
Key Takeaways
- Targets obliques for stronger and toned abdominal muscles
- Enhances core stability and improves posture
- Increases flexibility in the spine for better range of motion
- Engages hip muscles for improved mobility and stability
Benefits of the Surrender Side Bend
Experience the numerous benefits of the Surrender Side Bend exercise. This variation of the side bend targets your obliques, helping to strengthen and tone your abdominal muscles. By incorporating this exercise into your fitness routine, you can enhance your core stability and improve your overall posture.
One of the key benefits of the Surrender Side Bend is its ability to increase flexibility in your spine. As you perform the exercise, you'll feel a deep stretch along the side of your body, promoting better range of motion and reducing the risk of injury during other physical activities.
Additionally, this exercise engages your hip muscles, contributing to better hip mobility and stability. By regularly practicing the Surrender Side Bend, you can improve your balance and coordination, making everyday movements easier and more efficient.
Another advantage of this exercise is its versatility. You can modify the intensity by using different weights or resistance bands, allowing you to tailor the exercise to your fitness level. Furthermore, you can incorporate variations such as twisting or reaching overhead to target different muscle groups and add variety to your workout routine.
Proper Form and Technique for the Surrender Side Bend
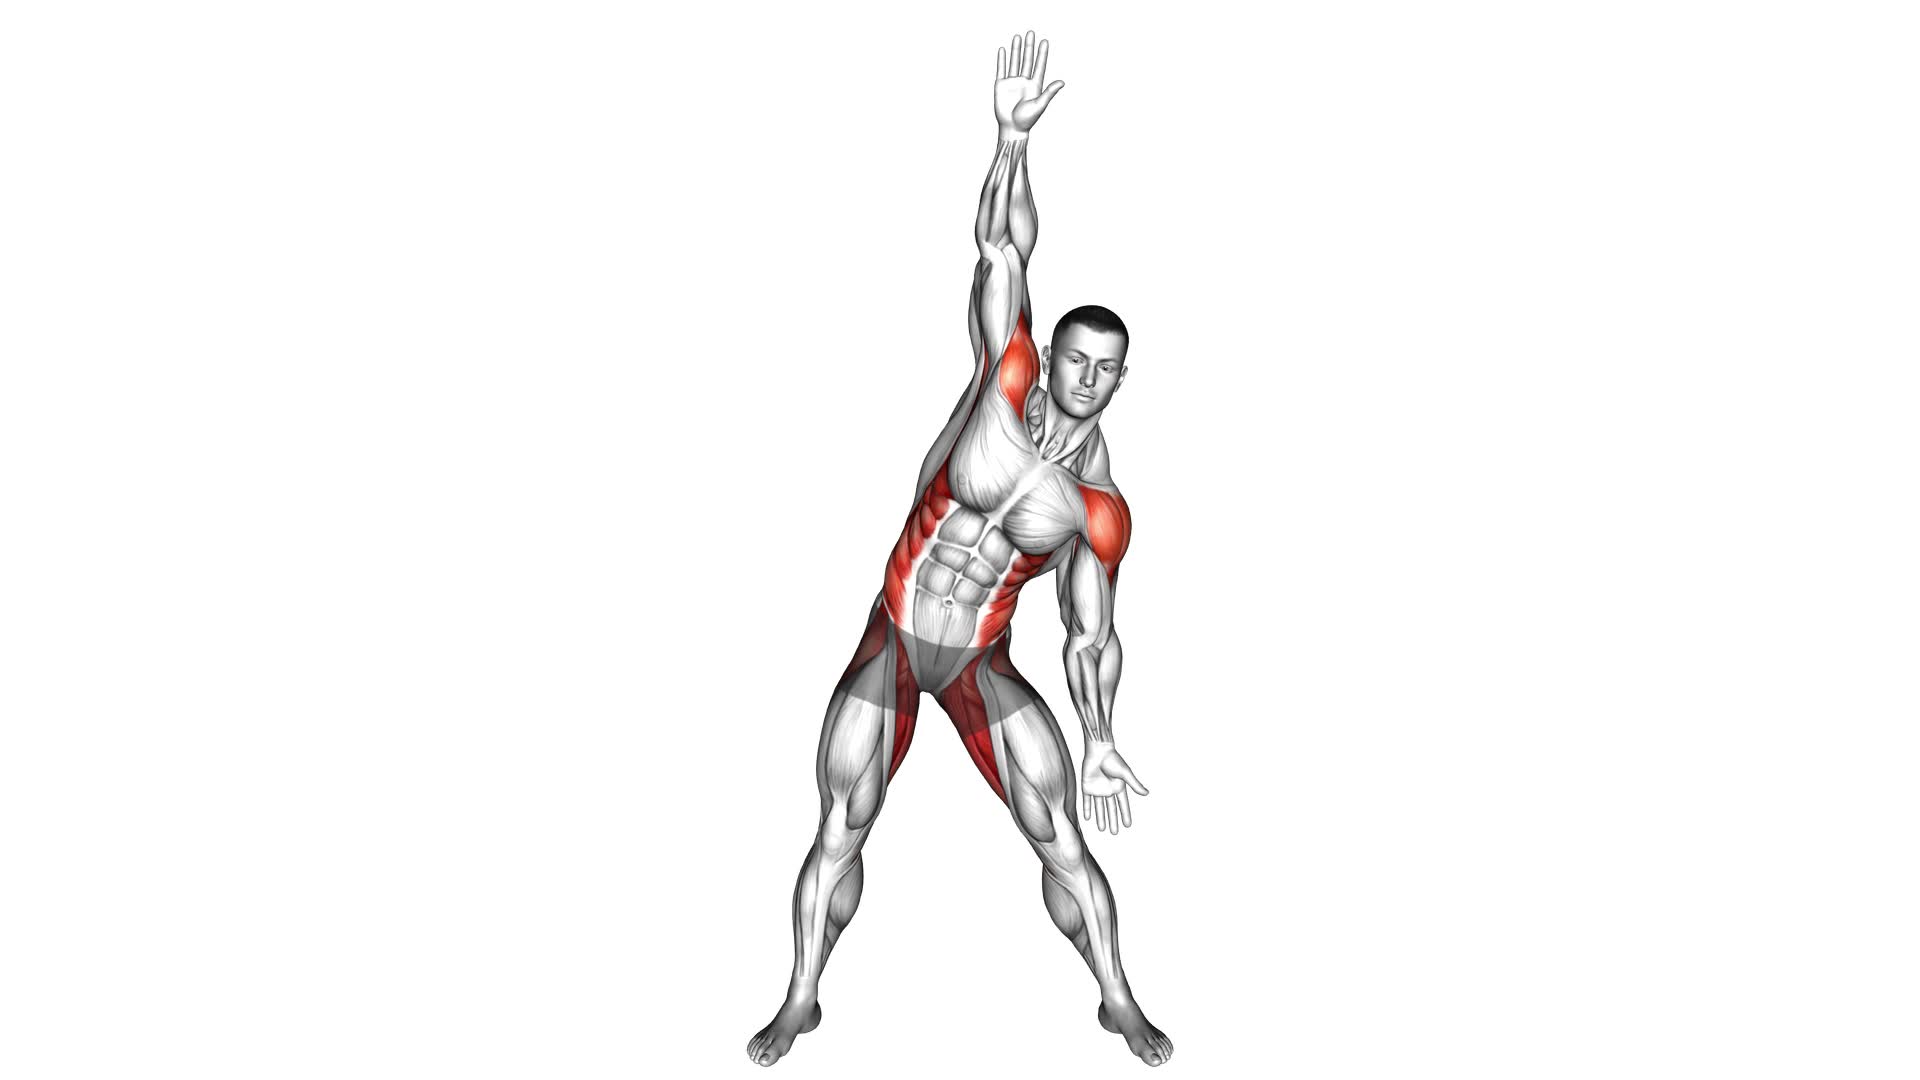
To perform the Surrender Side Bend with proper form and technique, start by positioning yourself on your hands and knees. Begin by extending your right leg straight out behind you, keeping your toes pointed and the top of your foot on the ground. Next, reach your left arm up towards the ceiling, keeping your gaze forward.
From here, slowly bend your left elbow and lower your upper body towards the ground, while simultaneously bending your right knee and bringing it towards your right elbow. Engage your core to maintain stability and control throughout the movement. As you lower your body, focus on lengthening through the side of your body and feeling a stretch along your left side. Hold this position for a few seconds, then return to the starting position.
Proper form and technique are essential for maximizing the benefits of the Surrender Side Bend. This exercise primarily targets the obliques, while also engaging the muscles of the core, shoulders, and hips. It helps improve stability, balance, and flexibility.
Modifications can be made based on your fitness level and comfort. If you have wrist issues, you can perform the exercise on your forearms instead of your hands. You can also decrease the intensity by bending your knee to a lesser degree or keeping your foot on the ground. As you become more proficient, you can increase the challenge by holding a dumbbell in the hand that's reaching upwards.
Now that you understand the proper form and technique, let's explore some variations and modifications for the Surrender Side Bend.
Variations and Modifications for the Surrender Side Bend
To vary the intensity of the Surrender Side Bend exercise, you can try different modifications based on your fitness level and personal preferences. Here are five variations and modifications you can incorporate into your routine:
- Increase or decrease weight: Depending on your strength and goals, you can adjust the amount of weight you use during the exercise. Adding more weight will make the exercise more challenging, while reducing the weight will make it easier.
- Adjust the depth of the bend: You can modify the intensity of the exercise by bending deeper or shallower. A deeper bend will engage more muscles and increase the difficulty, while a shallower bend will provide a lighter workout.
- Use a stability ball: By performing the Surrender Side Bend exercise on a stability ball, you'll challenge your balance and engage your core muscles even more.
- Incorporate a twist: To add an extra challenge, you can incorporate a twist at the top of the movement. This will engage your obliques and increase the difficulty of the exercise.
- Try single-arm or single-leg variations: By performing the exercise with one arm or one leg at a time, you'll increase the demand on your core muscles and improve stability.
Remember to listen to your body and choose modifications that suit your fitness level and goals. Experiment with different variations to keep your workouts exciting and challenging.
Common Mistakes to Avoid When Performing the Surrender Side Bend
To perform the Surrender Side Bend correctly and avoid common mistakes, focus on maintaining proper form and engaging the appropriate muscles. By doing so, you can avoid injury and maximize your results.
One common mistake to avoid is allowing your upper body to collapse forward. This can put unnecessary strain on your lower back and decrease the effectiveness of the exercise. Instead, keep your chest lifted and your spine elongated throughout the movement.
Another mistake is using momentum to swing your body side to side. This not only reduces the effectiveness of the exercise but also increases the risk of injury. Instead, move slowly and intentionally, focusing on engaging your obliques and core muscles.
It's also important to avoid overarching or rounding your lower back during the side bend. This can put excessive strain on your spine and lead to discomfort or injury. Instead, maintain a neutral spine position throughout the movement.
Tips for Incorporating the Surrender Side Bend Into Your Workout Routine
To incorporate the Surrender Side Bend into your workout routine, start by using a light dumbbell or resistance band. Here are some tips to help you get the most out of this exercise:
- Proper breathing techniques during the surrender side bend: Remember to breathe in deeply through your nose and exhale through your mouth as you perform the movement. This will help you maintain control and engage your core muscles effectively.
- Focus on form and alignment: Keep your spine straight and your shoulders relaxed throughout the exercise. Avoid leaning or hunching forward, as this can strain your back.
- Start with a comfortable weight: If you're new to the surrender side bend, start with a lighter weight and gradually increase the resistance as you get stronger and more comfortable with the movement.
- Increase the intensity for advanced practitioners: Once you've mastered the basic form, you can challenge yourself by using a heavier dumbbell or resistance band. You can also try adding a stability ball or Bosu ball to further engage your core muscles.
- Listen to your body: Pay attention to how your body feels during the exercise. If you experience any pain or discomfort, stop and consult a professional.
Frequently Asked Questions
How Many Sets and Reps Should I Do for the Surrender Side Bend Exercise?
To determine the sets and reps for the surrender side bend exercise, you need to consider your fitness level and goals. As a general guideline, start with 2-3 sets of 10-12 reps per side.
Gradually increase the intensity by adding weights or increasing reps as you get stronger.
Remember, there are variations of the surrender side bend that you can explore to challenge yourself further.
Always listen to your body and consult a fitness professional for personalized advice.
Can the Surrender Side Bend Help Me Lose Belly Fat?
Yes, the surrender side bend can definitely help you lose belly fat.
It's an effective exercise for targeting your obliques and core muscles, which can contribute to overall fat loss in that area.
Is It Safe to Perform the Surrender Side Bend if I Have a History of Lower Back Pain?
If you have a history of lower back pain, it's important to consider a modification for the surrender side bend exercise. While the surrender side bend can be effective for strengthening the core and toning the waist, it may not be safe for everyone with lower back issues.
Instead, focus on alternative exercises that can provide lower back pain relief, such as gentle stretches, yoga poses like child's pose, or exercises that target the glutes and hip flexors.
Can I Do the Surrender Side Bend Without Any Equipment?
Yes, you can definitely do the surrender side bend without any equipment. This exercise is a great way to stretch and strengthen your core muscles. It helps improve your balance and flexibility.
By incorporating different variations of the surrender side bend into your workout routine, you can target different muscle groups and make your workout more challenging.
How Long Does It Take to See Results From Doing the Surrender Side Bend Regularly?
Regularly incorporating the surrender side bend into your workout routine can lead to noticeable results over time.
By maintaining proper form and making any necessary modifications, you can effectively target your core, obliques, and hip flexors.
This exercise helps improve flexibility, stability, and posture.
Consistency is key, so aim to perform this exercise at least a few times a week.
Remember to listen to your body and gradually increase intensity for optimal results.
Conclusion
Incorporating the Surrender Side Bend into your workout routine can provide numerous benefits. This exercise can improve core strength, flexibility, and stability. By following proper form and technique, you can effectively target your obliques and strengthen your entire body. Remember to avoid common mistakes and consider variations or modifications to suit your fitness level. With this exercise, you can add a challenging and effective move to your fitness routine.

Author
Years ago, the spark of my life’s passion ignited in my mind the moment I stepped into the local gym for the first time. The inaugural bead of perspiration, the initial endeavor, the very first surge of endorphins, and a sense of pride that washed over me post-workout marked the beginning of my deep-seated interest in strength sports, fitness, and sports nutrition. This very curiosity blossomed rapidly into a profound fascination, propelling me to earn a Master’s degree in Physical Education from the Academy of Physical Education in Krakow, followed by a Sports Manager diploma from the Jagiellonian University. My journey of growth led me to gain more specialized qualifications, such as being a certified personal trainer with a focus on sports dietetics, a lifeguard, and an instructor for wellness and corrective gymnastics. Theoretical knowledge paired seamlessly with practical experience, reinforcing my belief that the transformation of individuals under my guidance was also a reflection of my personal growth. This belief holds true even today. Each day, I strive to push the boundaries and explore new realms. These realms gently elevate me to greater heights. The unique combination of passion for my field and the continuous quest for growth fuels my drive to break new ground.


