Butterfly Yoga Pose – Video Exercise Guide & Tips

Are you looking to improve your flexibility and find inner peace? Look no further than the Butterfly Yoga Pose!
Watch This Exercise Video
In this video exercise guide, we will show you how to properly perform this pose to reap its numerous benefits. Avoid common mistakes, make modifications as a beginner, and discover tips to deepen your practice.
Get ready to incorporate the Butterfly Pose into your yoga routine and experience a newfound sense of tranquility. Let's dive in and get started!
Key Takeaways
- Butterfly yoga pose improves flexibility in the hips and groin area.
- It stimulates abdominal organs and improves digestion.
- Modifications with props can be used for those with tight hips or lower back issues.
- Engaging the core and practicing proper hip alignment are important for stability and preventing strain.
Benefits of Butterfly Yoga Pose
You can experience numerous benefits from practicing the Butterfly Yoga Pose. This pose, also known as Baddha Konasana, is a seated posture that helps to open up the hips and groin. It's a gentle stretch that can be done by people of all fitness levels.
One of the benefits of the Butterfly Pose is that it helps to improve flexibility in the hips and groin area. By holding the pose for a few breaths, you can deepen the stretch and increase your range of motion. Another benefit is that it helps to stimulate the abdominal organs and improve digestion.
Variations of the Butterfly Pose include using props such as blocks or blankets to support the knees and hips, which can be helpful for those with tight hips or lower back issues. Before practicing the Butterfly Pose, it's important to prepare the body by warming up the hips and groins with some gentle stretches. This can help to prevent injuries and ensure that you get the most out of your practice.
How to Do Butterfly Yoga Pose
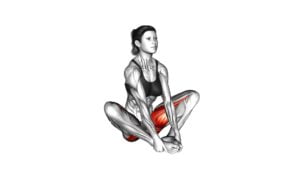
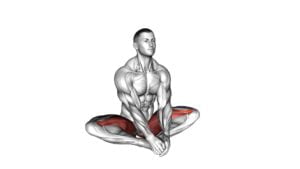
To do the Butterfly Yoga Pose, start by sitting on the floor with your knees bent and the soles of your feet touching each other. Allow your knees to drop open towards the ground.
Keep your spine straight and engage your core. Take deep breaths as you gently press your knees down towards the ground, feeling a stretch in your inner thighs.
Benefits of Butterfly Pose
The benefits of Butterfly Pose include increased flexibility and relaxation in the hips and groin area. By regularly practicing this pose, you can improve the flexibility in your hips, which can be particularly beneficial if you have tight hip muscles or joints.
The gentle stretching and opening of the hips in Butterfly Pose can also help relieve lower back pain. As you sit in this pose, you may feel a gentle release in your lower back, alleviating any tension or discomfort.
Additionally, Butterfly Pose helps stimulate the abdominal organs, improving digestion and promoting overall gut health. This pose is also known to calm the mind and reduce stress and anxiety.
Incorporating Butterfly Pose into your yoga practice can provide numerous physical and mental benefits.
Alignment and Modifications
Begin by sitting on the floor with your legs extended in front of you.
To practice Butterfly Pose, bring the soles of your feet together and allow your knees to fall out to the sides, creating a diamond shape with your legs.
This pose is known for its ability to open the hips and stretch the inner thighs.
However, if you find it challenging to sit comfortably in this position, you can modify the pose by placing blocks or folded blankets under your knees for support. This will help reduce any strain or discomfort in the hips.
Additionally, you can experiment with different variations of Butterfly Pose, such as using a strap to gently pull your feet closer to your body or leaning forward to deepen the stretch.
Props like bolsters or pillows can also be used to support your upper body in a more relaxed position.
Explore these modifications and variations to find what works best for your body.
Breathing Techniques During Pose
As you settle into Butterfly Pose, breathe deeply and rhythmically to enhance the opening of your hips and the stretching of your inner thighs. Deepening your breath in this pose allows you to connect with your body and cultivate a sense of mindfulness.
Here are four breathing techniques to incorporate into your practice:
- Diaphragmatic breathing: As you inhale, let your belly expand fully, allowing your diaphragm to descend. Exhale slowly, letting your belly gently contract.
- Three-part breath: Inhale deeply, filling your belly, ribcage, and chest with air. Exhale slowly, releasing the air from your chest, ribcage, and then belly.
- Ujjayi breath: Constrict the back of your throat slightly as you breathe in and out through your nose. This creates a subtle ocean-like sound and helps to calm the mind.
- Mindfulness meditation: Focus your attention on the sensation of your breath as it moves in and out of your body. Let go of any distractions and bring yourself fully into the present moment.
Common Mistakes to Avoid in Butterfly Pose
When practicing Butterfly Pose, it's important to pay attention to proper hip alignment. Many people tend to let their knees drop too far towards the ground, which can strain the hips and lower back.
Engaging your core muscles throughout the pose will help you maintain stability and protect your spine.
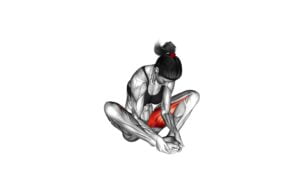
Lastly, don't forget to focus on your breath, inhaling deeply as you lengthen your spine and exhaling as you fold forward.
Proper Hip Alignment
First, align your hips properly to avoid common mistakes in the Butterfly Pose. Proper hip alignment is crucial for maximizing the benefits of this pose and preventing injury. Here are four key tips to help you achieve the correct alignment:
- Engage your core: By activating your core muscles, you create stability and support for your hips, allowing for a deeper stretch and better control of the pose.
- Relax your glutes: Avoid clenching your glute muscles, as this can restrict movement and limit hip flexibility. Instead, focus on releasing tension in your glutes and allowing the hips to open naturally.
- Maintain a neutral pelvis: Keep your pelvis in a neutral position by gently tucking your tailbone and lengthening your spine. This helps to align the hips and prevent excessive rounding or arching of the lower back.
- Use props if needed: If you have tight hips or limited mobility, consider using props such as blocks or blankets to support your knees or sit bones. This can help you find a comfortable position and gradually increase your hip flexibility over time.
Engaging Core Muscles
To avoid common mistakes in the Butterfly Pose, it's important for you to engage your core muscles properly. Strengthening your abs and engaging your abdominal muscles will help you maintain stability and control during the pose. Make sure to draw your navel towards your spine and engage your lower abs. This won't only support your lower back but also help you maintain a strong and stable base.
Keep your core engaged throughout the pose to prevent any strain on your back or neck. By actively engaging your core, you'll experience better balance and stability in the Butterfly Pose.
Now that you have properly engaged your core, let's move on to the next section about breathing techniques.
Breathing Techniques
To maintain proper form and maximize the benefits of the Butterfly Pose, it's essential that you focus on your breathing techniques. Correct breathing can enhance the mind-body connection and deepen your practice. Here are four important tips to help you master your breath in Butterfly Pose:
- Pranayama techniques: Incorporate pranayama, or breath control exercises, to calm the mind and energize the body. Try deep belly breathing or alternate nostril breathing.
- Mindful breathing techniques: Be fully present and aware of your breath as you move through the pose. Take slow, deep breaths, inhaling and exhaling through the nose.
- Avoid shallow breathing: Take care not to let your breath become shallow or restricted. Instead, focus on expanding your breath fully into your belly and chest.
- Maintain a steady rhythm: Find a steady and comfortable rhythm for your breath, syncing it with your movements to create a sense of flow and relaxation.
By mastering these breathing techniques, you'll enhance your experience in Butterfly Pose, allowing for deeper relaxation and a more connected practice.
Now, let's explore some modifications for beginners in Butterfly Pose.
Modifications for Beginners in Butterfly Pose
For beginners in Butterfly Pose, start by sitting on the floor with the soles of your feet touching and your knees bent. This pose, also known as Baddha Konasana, is a great hip opener and can help improve flexibility in the hips and groin area.
If you find it difficult to sit with your feet close to your pelvis, you can place blocks or folded blankets under your knees to provide support and make the pose more accessible. Another modification for beginners is to place your hands behind you on the floor, fingers pointing towards your body, and use them to support your weight and help maintain balance.
As you progress and become more flexible, you can gradually bring your feet closer to your pelvis and work towards a more open and upright posture. Remember to listen to your body and only go as far as feels comfortable.
With regular practice, you'll notice increased flexibility and improved alignment in Butterfly Pose.
Tips for Deepening Your Butterfly Pose
To deepen your Butterfly Pose, focus on gradually increasing the flexibility in your hips and groin area. Here are four tips to help you improve your flexibility and posture in this pose:
- Warm-up: Before attempting the Butterfly Pose, warm up your body with some gentle stretches and movements. This will help prepare your muscles and joints for the deeper stretch.
- Use props: If you find it challenging to sit comfortably in the pose, try using props like yoga blocks or blankets. Place them under your knees or sit on a folded blanket to provide support and make the pose more accessible.
- Gentle pressure: Once you're in the pose, gently press your elbows against your thighs to encourage a deeper opening in your hips and groin. Remember to maintain a steady breath and avoid any discomfort or pain.
- Gradual progression: Deepening your Butterfly Pose takes time and patience. Instead of forcing yourself into a deeper stretch, focus on gradually increasing the range of motion in your hips. With consistent practice, your flexibility will improve, and you'll be able to go deeper into the pose.
Incorporating Butterfly Pose Into Your Yoga Routine
Add Butterfly Pose to your yoga routine for increased hip flexibility and a calming stretch. Incorporating this pose into your practice can help to open up the hips and release tension in the lower back.
To modify the pose, you can use props such as blocks or blankets to support the knees and maintain a comfortable position. This is especially helpful if you have tight hips or limited flexibility.
As you settle into the pose, focus on your breath and allow yourself to relax into the stretch. You can also try different stretching techniques while in Butterfly Pose, such as gently pressing the knees down towards the ground or leaning forward to deepen the stretch.
Remember to listen to your body and never force any movement that feels uncomfortable.
Frequently Asked Questions
What Are Some Other Yoga Poses That Can Complement Butterfly Pose in a Yoga Routine?
When you're looking to complement the Butterfly Pose in your yoga routine, consider incorporating Warrior Poses and Child's Pose.
Warrior Poses, like Warrior I and Warrior II, can help build strength and stability in your legs and core.
Child's Pose is a great way to rest and stretch your back after practicing Butterfly Pose.
These poses can enhance your overall yoga practice and provide a well-rounded workout for your body.
Can Butterfly Pose Help With Improving Flexibility in the Hips?
Butterfly pose can be a great way to improve flexibility in your hips. It helps to open up the hip joints and stretch the inner thighs.
Beginners can modify the pose by placing blocks under their knees for support. There are also variations of butterfly pose that you can try, such as reclined butterfly pose or bound angle pose.
These variations provide different levels of intensity and allow you to explore different aspects of the pose.
Are There Any Precautions or Contraindications for Practicing Butterfly Pose?
When practicing butterfly pose, it's important to be aware of any precautions or contraindications. This pose may not be suitable for you if you have a knee injury or recently undergone hip surgery.
It's also important to listen to your body and avoid any pain or discomfort. If you have any concerns or medical conditions, it's best to consult with a qualified yoga instructor or healthcare professional before attempting this pose.
How Long Should One Hold Butterfly Pose for Maximum Benefits?
To maximize the benefits of butterfly pose, it's important to hold the pose for a sufficient amount of time. By holding the pose for at least 1-2 minutes, you can experience greater opening and flexibility in the hips and groin area.
This pose also promotes relaxation and can have positive effects on mental health. Beginners can modify the pose by using blocks or blankets under the knees for added support and comfort.
Can Butterfly Pose Be Practiced During Pregnancy?
During pregnancy, it's important to stay active and maintain a healthy body. Yoga can be a great way to achieve this.
Butterfly pose, also known as Baddha Konasana, can be practiced during pregnancy to help open up the hips and stretch the groin area. This pose can also help relieve lower back pain and improve blood circulation.
Remember to listen to your body and consult with your healthcare provider before starting any new exercise routine.
Conclusion
Incorporating the butterfly yoga pose into your routine can offer numerous benefits, including improved flexibility, relaxation, and stimulation of the reproductive organs.
To perform the pose correctly, sit with your feet together and gently press your knees down towards the floor, keeping your back straight.
Avoid common mistakes such as rounding the spine or forcing the knees too far down.
Beginners can modify the pose by using props or sitting on a folded blanket.
Remember to listen to your body and gradually deepen your practice over time.

Author
Years ago, the spark of my life’s passion ignited in my mind the moment I stepped into the local gym for the first time. The inaugural bead of perspiration, the initial endeavor, the very first surge of endorphins, and a sense of pride that washed over me post-workout marked the beginning of my deep-seated interest in strength sports, fitness, and sports nutrition. This very curiosity blossomed rapidly into a profound fascination, propelling me to earn a Master’s degree in Physical Education from the Academy of Physical Education in Krakow, followed by a Sports Manager diploma from the Jagiellonian University. My journey of growth led me to gain more specialized qualifications, such as being a certified personal trainer with a focus on sports dietetics, a lifeguard, and an instructor for wellness and corrective gymnastics. Theoretical knowledge paired seamlessly with practical experience, reinforcing my belief that the transformation of individuals under my guidance was also a reflection of my personal growth. This belief holds true even today. Each day, I strive to push the boundaries and explore new realms. These realms gently elevate me to greater heights. The unique combination of passion for my field and the continuous quest for growth fuels my drive to break new ground.


