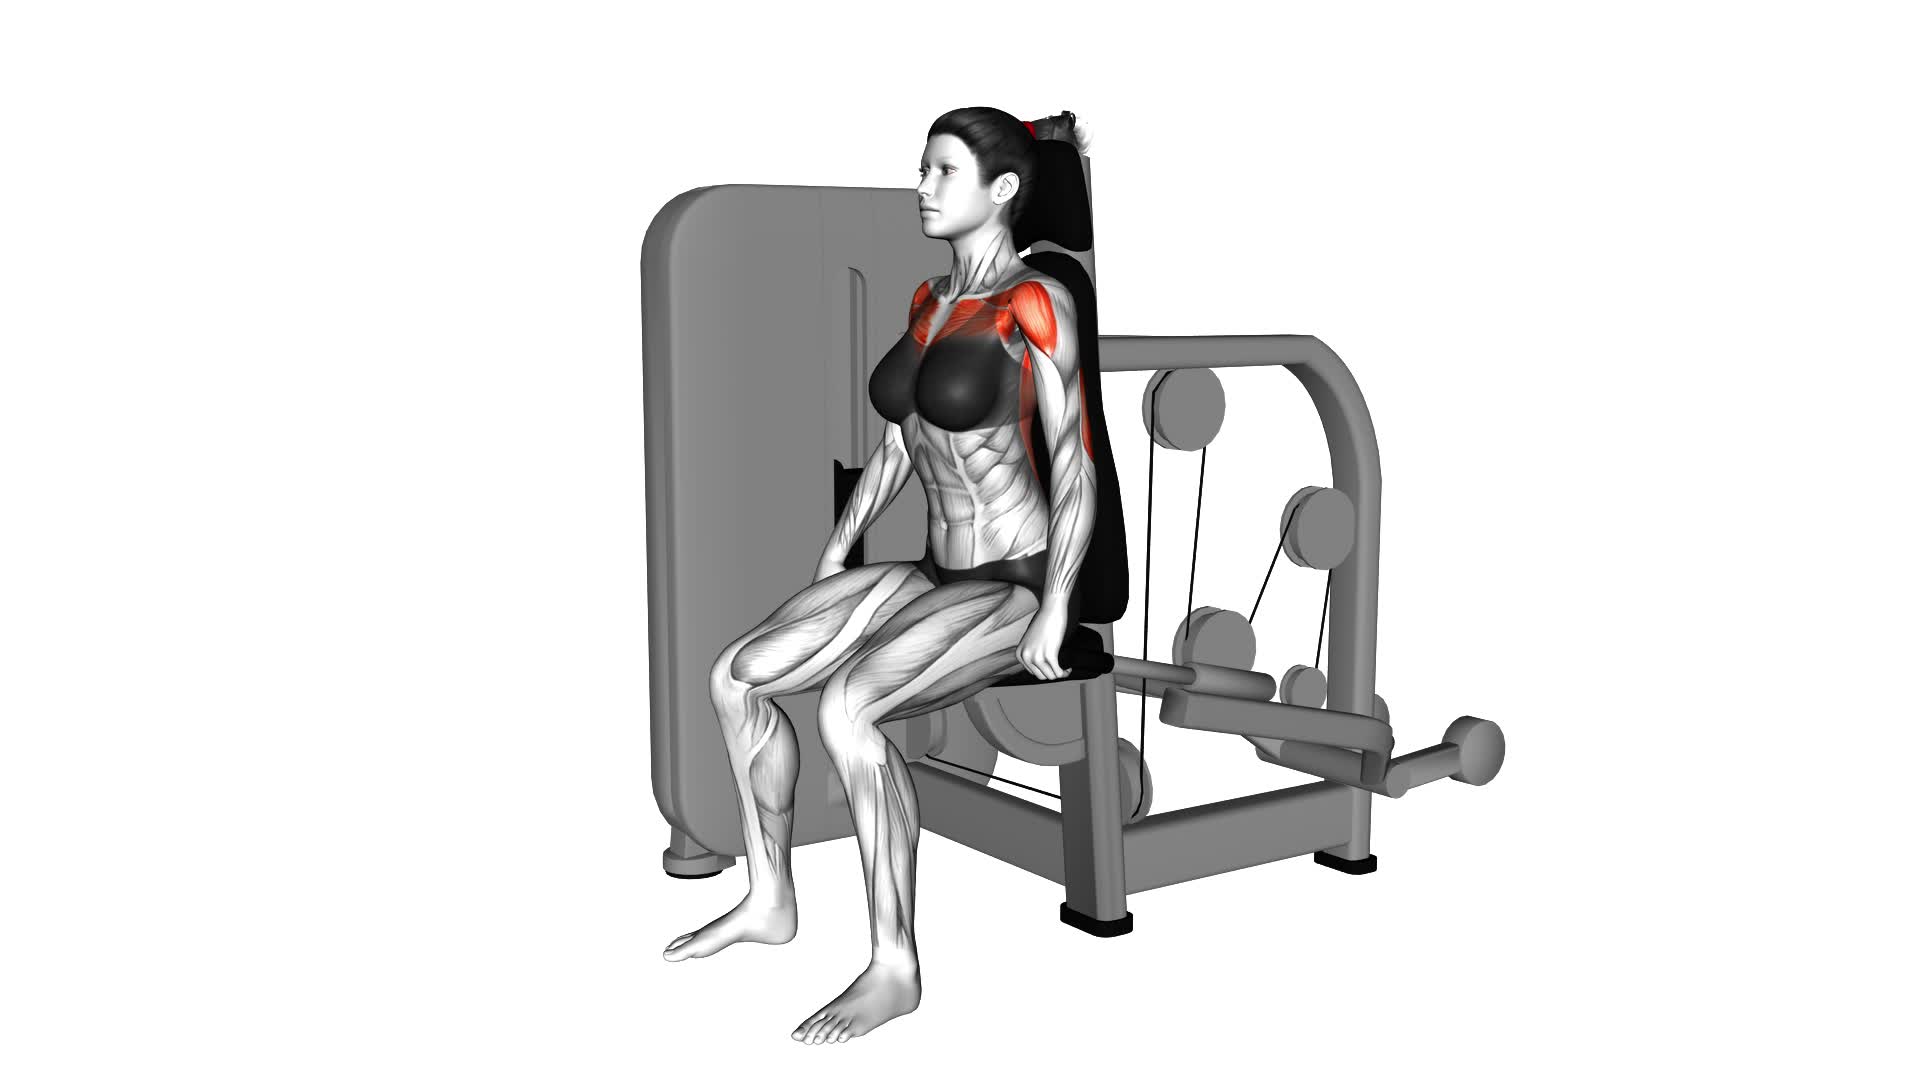
Lever Seated Dip (female) – Video Exercise Guide & Tips

Are you looking for a challenging exercise that targets your upper body? Look no further than the lever seated dip!
Watch This Exercise Video
In this video exercise guide, we'll show you how to properly perform this move to strengthen your triceps and chest muscles. Avoid common mistakes and learn tips to progress and increase difficulty.
Get ready to take your fitness to the next level with the lever seated dip. Let's dive in!
Key Takeaways
- Lever seated dip targets multiple upper body muscles including chest, triceps, and shoulders.
- Resistance bands can be used as alternative equipment for a greater range of motion.
- Proper form is important, including avoiding rounded shoulders and locked elbows.
- Progression can be achieved by gradually adding weight or resistance, or trying advanced variations like single-leg dips or tempo dips.
Benefits of the Lever Seated Dip
You should regularly perform the Lever Seated Dip to maximize its benefits. This exercise is great for targeting multiple muscles in your upper body, including your chest, triceps, and shoulders. During the lever seated dip, your chest muscles are activated as you push yourself up, while your triceps play a major role in extending your elbows. Your shoulders also come into play as they stabilize your upper body throughout the movement.
To add variation to your lever seated dip routine, you can modify the exercise by changing the placement of your hands. For instance, by placing your hands closer together, you can increase the emphasis on your triceps. On the other hand, if you widen your hand placement, you'll engage your chest muscles to a greater extent. Another variation is to use different types of equipment, such as parallel bars or a dip machine, which can provide additional support or challenge depending on your fitness level.
Incorporating these variations will ensure that you target different muscle groups and continue to challenge your body. So, make sure to include the lever seated dip in your workout routine for a well-rounded upper body workout.
Proper Equipment for the Exercise
To properly perform the Lever Seated Dip, it's crucial to have the appropriate equipment. One option for this exercise is to use resistance bands. Resistance bands offer several benefits, including providing constant tension throughout the movement, which helps to engage the muscles more effectively. They also allow for a greater range of motion compared to using weights or machines. Resistance bands are portable and versatile, making them a convenient choice for at-home workouts or traveling.
If you don't have access to resistance bands, there are alternative exercises you can try to target the same muscle groups. One option is the bench dip, which can be done using a stable bench or chair. Another alternative is the tricep pushdown using a cable machine or resistance band attachment. Both exercises effectively work the tricep muscles, similar to the Lever Seated Dip.
Now that you understand the importance of having the proper equipment and have alternative options in mind, let's move on to the step-by-step guide to performing the Lever Seated Dip.
Step-by-Step Guide to Performing the Exercise
To perform the Lever Seated Dip, begin by positioning yourself on the lever machine with your feet securely planted on the footrests. Now, let's break down the step-by-step guide to help you perform the exercise correctly:
- Grip the handles: Place your hands on the handles with an overhand grip, slightly wider than shoulder-width apart. Ensure a firm grip to maintain control throughout the movement.
- Lower your body: Slowly bend your elbows and lower your body down until your upper arms are parallel to the floor. Keep your back straight and avoid slouching or rounding your shoulders.
- Push back up: Engage your triceps and chest muscles to push your body back up to the starting position. Make sure to keep your movements controlled and avoid using momentum.
Variations of the lever seated dip:
- Assisted lever seated dip: If you're new to this exercise or need assistance, you can use a weight-assisted machine that helps lighten the load.
- Weighted lever seated dip: For advanced individuals looking to increase the intensity, you can add weight plates to a dipping belt or use a weight vest.
- Single-arm lever seated dip: By performing the exercise with one arm at a time, you can increase the challenge and focus on each side independently.
Muscles targeted during the lever seated dip:
- Primary muscles: Triceps brachii, pectoralis major (chest)
- Secondary muscles: Anterior deltoids (front shoulders), rhomboids (upper back), and trapezius (upper back and neck)
Remember to consult with a fitness professional or trainer before attempting any new exercises, especially if you have any underlying health conditions or injuries.
Common Mistakes to Avoid
To avoid common mistakes, it's important to be mindful of the following when performing the Lever Seated Dip exercise.
One common mistake to watch out for is using too much momentum. Remember to keep your movement controlled and avoid swinging your body during the exercise. This will ensure that you're effectively targeting the muscles you intend to work.
Another common mistake isn't maintaining proper form. It's essential to keep your back straight throughout the exercise and avoid rounding your shoulders. This will help prevent unnecessary strain on your spine and ensure that you're engaging the correct muscles.
Additionally, make sure to avoid locking your elbows at the top of the movement. Keeping a slight bend in your elbows will maintain tension in your muscles and prevent potential injury.
Lastly, it's crucial to choose an appropriate weight for the exercise. Using too heavy of a weight can compromise your form and increase the risk of injury. Start with a weight that challenges you but allows you to maintain proper technique.
Tips for Progressing and Increasing Difficulty
To progress and increase the difficulty of the Lever Seated Dip exercise, you can gradually add additional weight or resistance. Here are some progression tips and advanced variations to help you take your workout to the next level:
- Increase the weight: Start by using a weight that challenges you but still allows you to perform the exercise with proper form. As you get stronger, gradually increase the weight to continue challenging your muscles.
- Use resistance bands: Attach resistance bands to the dip bars or your body to add extra resistance. This will increase the difficulty of the exercise and help you build more strength.
- Try advanced variations: Once you have mastered the basic Lever Seated Dip, you can try some advanced variations to further challenge your muscles. These include:
- Single-leg dips: Lift one leg off the ground and perform the exercise using only one leg. This will engage your core and stabilizing muscles even more.
- Weighted dips: Hold a dumbbell or a weighted plate between your feet or use a weighted vest to increase the resistance.
- Tempo dips: Slow down the movement by lowering yourself down slowly and pausing at the bottom before pushing back up. This will increase time under tension and make the exercise more challenging.
Frequently Asked Questions
How Many Calories Can I Burn by Doing the Lever Seated Dip Exercise?
By incorporating the lever seated dip exercise into your workout routine, you can burn a significant number of calories. This exercise targets multiple muscle groups, including your triceps, chest, and shoulders, making it an effective way to tone and strengthen your upper body.
Whether you're a beginner or at an advanced fitness level, there are variations of the lever seated dip that you can try. So, get ready to torch calories and take your fitness to the next level with this challenging exercise.
Can the Lever Seated Dip Help in Toning My Upper Body?
Yes, the lever seated dip can definitely help in toning your upper body.
By incorporating different variations of the lever seated dip into your workout routine, you can target various muscles in your arms, shoulders, and chest.
This exercise is great for overall strength as it engages multiple muscle groups at once.
Is It Safe to Perform the Lever Seated Dip Exercise if I Have a Shoulder Injury?
If you have a shoulder injury, it may not be safe to perform the lever seated dip exercise. It's important to prioritize your safety and avoid aggravating the injury.
Instead, focus on alternative exercises for shoulder injury rehabilitation, such as shoulder stretches and strengthening exercises recommended by a physical therapist.
Additionally, make sure to follow tips for preventing shoulder injuries during exercise routines, like maintaining proper form, using lighter weights, and listening to your body's signals.
How Many Sets and Repetitions Should I Do for the Lever Seated Dip Exercise?
For the lever seated dip exercise, it's important to consider your fitness level and goals. Generally, you should aim for 3-4 sets of 8-12 repetitions. This will help build strength and muscle endurance.
However, if you're looking to burn more calories, you can increase the intensity by adding weights or reducing rest time between sets.
Remember to listen to your body and make modifications if needed. Always consult with a professional if you have any concerns or injuries.
Can I Modify the Lever Seated Dip Exercise to Make It Easier or More Challenging?
Sure!
You can definitely modify the lever seated dip exercise to make it easier or more challenging. To make it easier, you can use a resistance band or decrease the range of motion.
To make it more challenging, you can add weight or increase the range of motion.
Modified variations of this exercise can target different muscle groups, such as triceps, chest, and shoulders.
These variations can provide many benefits for your upper body strength and muscle development.
Conclusion
In conclusion, the lever seated dip is a highly effective exercise for strengthening the upper body, particularly the triceps and chest muscles. By following the proper equipment and technique guidelines, you can maximize the benefits of this exercise and avoid common mistakes.
Additionally, incorporating progression and increasing difficulty over time can help you continue to challenge your muscles and see ongoing improvements in strength and muscle tone.
Give this exercise a try to take your upper body workout to the next level.

Author
Years ago, the spark of my life’s passion ignited in my mind the moment I stepped into the local gym for the first time. The inaugural bead of perspiration, the initial endeavor, the very first surge of endorphins, and a sense of pride that washed over me post-workout marked the beginning of my deep-seated interest in strength sports, fitness, and sports nutrition. This very curiosity blossomed rapidly into a profound fascination, propelling me to earn a Master’s degree in Physical Education from the Academy of Physical Education in Krakow, followed by a Sports Manager diploma from the Jagiellonian University. My journey of growth led me to gain more specialized qualifications, such as being a certified personal trainer with a focus on sports dietetics, a lifeguard, and an instructor for wellness and corrective gymnastics. Theoretical knowledge paired seamlessly with practical experience, reinforcing my belief that the transformation of individuals under my guidance was also a reflection of my personal growth. This belief holds true even today. Each day, I strive to push the boundaries and explore new realms. These realms gently elevate me to greater heights. The unique combination of passion for my field and the continuous quest for growth fuels my drive to break new ground.


