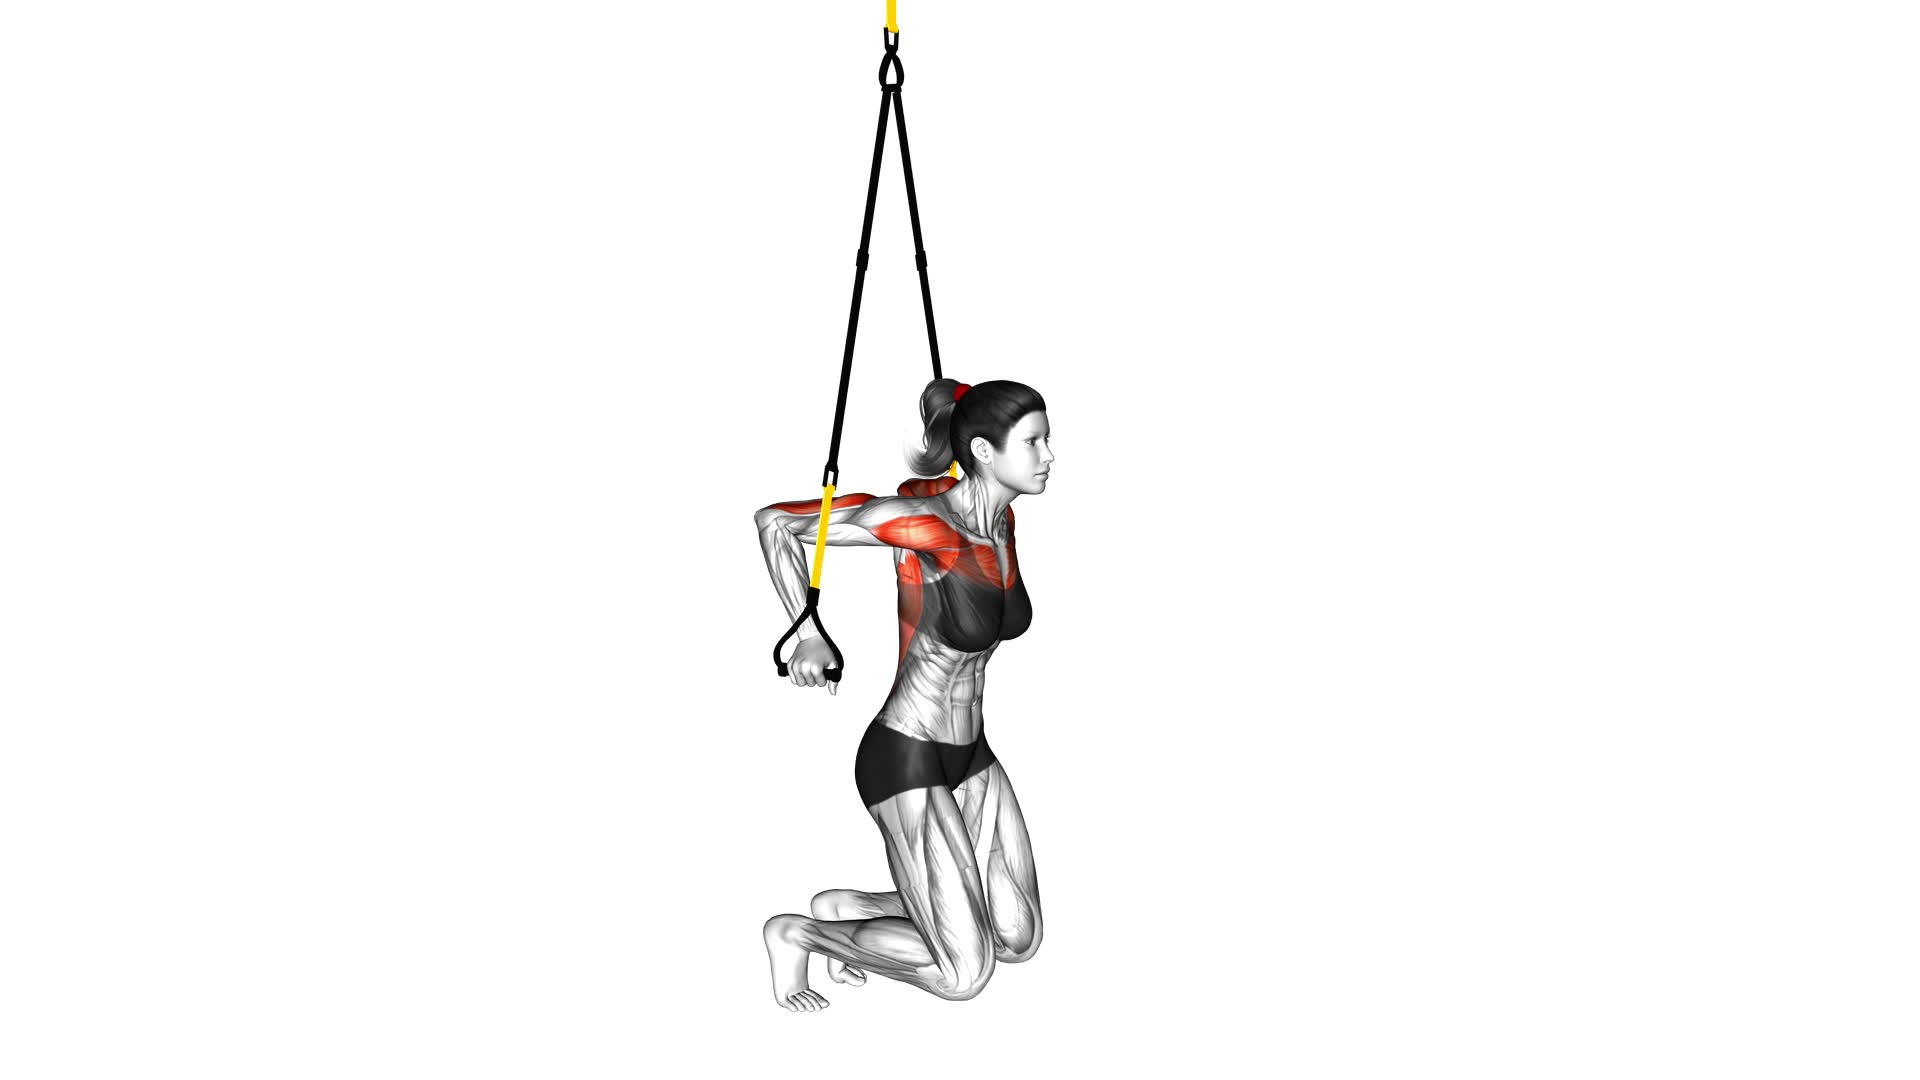
Suspender Self Assisted Chest Dip (female) – Video Exercise Guide & Tips

Looking to target your chest muscles with a challenging exercise? Check out the Suspender Self Assisted Chest Dip!
Watch This Exercise Video
This video exercise guide and tips will show you how to properly perform this move. Learn about the benefits, proper equipment setup, and step-by-step instructions for correct form and technique.
Plus, discover progression and variation options to keep challenging yourself. Avoid common mistakes and get ready to work those chest muscles!
Key Takeaways
- Targets chest muscles, specifically pectoralis major and minor
- Engages multiple muscle groups, including triceps, shoulders, and upper back
- Strengthens and tones the chest muscles
- Provides a comprehensive upper body workout
Benefits of Suspender Self Assisted Chest Dip
What are the benefits of the Suspender Self Assisted Chest Dip for you?
The Suspender Self Assisted Chest Dip offers numerous benefits for your chest and upper body strength. One of the main benefits is that it targets your chest muscles, specifically the pectoralis major and minor. By performing chest dips, you can effectively strengthen and tone your chest, giving it a more defined and sculpted appearance.
Another benefit of the Suspender Self Assisted Chest Dip is that it engages multiple muscle groups. In addition to your chest, this exercise also works your triceps, shoulders, and upper back muscles. This means that you're getting a comprehensive upper body workout in one exercise.
Furthermore, the Suspender Self Assisted Chest Dip allows for variations that can target different areas of your chest. For example, if you want to focus on your inner chest, you can bring your hands closer together. On the other hand, if you want to target your outer chest, you can position your hands wider apart. These variations help to ensure that you're effectively working all areas of your chest.
In conclusion, the Suspender Self Assisted Chest Dip provides a range of benefits, including strengthening and toning your chest muscles, engaging multiple muscle groups, and allowing for variations to target different areas of your chest. With these benefits, this exercise is an excellent addition to your upper body workout routine.
Now that you know the benefits of the Suspender Self Assisted Chest Dip, let's move on to the next section about proper equipment setup.
Proper Equipment Setup
To properly set up the equipment for the Suspender Self Assisted Chest Dip, there are two key points to consider: the ideal suspension height and proper strap adjustment.
Firstly, you should ensure that the suspension height is at a level that allows you to fully extend your arms during the exercise.
Secondly, make sure the straps are adjusted so that they're securely fastened around your wrists, providing stability and support throughout the movement.
Ideal Suspension Height
You should set the suspension height at a level that allows for proper equipment setup. This is important because it ensures that you can perform the exercise with the correct form and get the most benefit from suspension training.
The ideal suspension height will depend on the exercise you're performing. For chest dips, you'll want the handles to be at about chest level. This allows you to fully extend your arms and engage your chest muscles. If the handles are too low, you won't be able to dip down far enough to effectively target your chest. If they're too high, you may strain your shoulders or not engage your chest muscles properly.
Finding the right suspension height is key to getting the most out of your workout. Remember to adjust the height as needed for different exercises, and always listen to your body to ensure proper form and avoid injury.
Proper Strap Adjustment
Adjust the straps of your suspension training equipment to ensure proper setup.
Proper strap adjustment is important for maintaining proper form and ensuring your safety during the exercise. Here are some key points to consider:
- Length: Adjust the straps so that they're at a length that allows you to fully extend your arms during the exercise.
- Equal Length: Make sure both straps are adjusted to the same length to maintain balance and stability.
- Secure Attachment: Ensure that the straps are securely attached to a stable anchor point to prevent any accidents or injuries.
Proper strap adjustment is crucial for a safe and effective workout.
Now that you understand the importance of this step, let's move on to the step-by-step guide for performing the exercise.
Step-by-Step Guide for Performing the Exercise
Once you have securely attached the suspenders to the dip bars, begin by positioning yourself in front of the bars.
To perform the Suspender Self Assisted Chest Dip exercise, you have the option to use different hand positions to target different muscle groups. For a wider grip, place your hands on the outer edges of the dip bars. This targets the chest muscles more intensely. If you prefer to focus on your triceps, use a narrower grip by placing your hands closer together.
Before starting the exercise, make sure to incorporate resistance bands if needed. Resistance bands can be attached to the suspenders to provide additional support and assistance during the chest dip. This is especially helpful for beginners or individuals who are working towards building more strength in their upper body.
Once you're in position, lower your body by bending your elbows and leaning forward slightly. Keep your chest up and your shoulders down. As you lower yourself, aim to reach a 90-degree angle at your elbows. Pause for a moment, and then push yourself back up to the starting position by straightening your arms. Remember to engage your chest and triceps muscles throughout the movement.
Repeat the exercise for the desired number of repetitions, ensuring proper form and control. As you progress, you can increase the difficulty by using less assistance from the suspenders or resistance bands.
And that's how you perform the Suspender Self Assisted Chest Dip exercise!
Tips for Correct Form and Technique
To maintain proper form and technique during the Suspender Self Assisted Chest Dip exercise, it's essential to focus on engaging the correct muscle groups and maintaining control throughout the movement. Here are some tips to help you achieve correct form and technique:
- Maintain correct posture: Stand tall with your shoulders back and chest lifted. Keep your core engaged and your spine in a neutral position throughout the exercise. Avoid slouching or rounding your shoulders.
- Use full range of motion: Lower your body until your upper arms are parallel to the ground, allowing your elbows to bend to about 90 degrees. Then, push yourself back up to the starting position. Avoid cutting the range of motion short by not fully extending your arms at the top or not going low enough at the bottom.
- Avoid common mistakes: One common mistake is relying too much on the suspension straps to support your body weight. Remember to engage your chest, triceps, and shoulder muscles to perform the movement rather than relying solely on the straps. Additionally, avoid using momentum to swing your body up and down, as this can compromise your form and reduce the effectiveness of the exercise.
Progression and Variation Options
Now that you have mastered the correct form and technique for the suspender self-assisted chest dip, it's time to challenge yourself further by exploring progression and variation options.
By increasing the difficulty level, you can continue to build strength and improve your overall fitness.
Additionally, you can experiment with different techniques to target specific muscle groups and add variety to your workout routine.
Increasing Difficulty Level
As you progress in your suspender self-assisted chest dip routine, you can increase the difficulty level by incorporating various progression and variation options. Here are three options to challenge yourself and continue making progress:
- Increase the number of reps: Gradually increase the number of repetitions you perform in each set. This will help build endurance and strength in your chest and triceps.
- Add resistance: Once you feel comfortable with your bodyweight, you can start adding resistance to your chest dips. This can be done by using a weight vest or holding a dumbbell between your feet.
- Change hand placement: Experiment with different hand placements during the exercise. For example, try placing your hands closer together or further apart to target different muscles in your chest and arms.
By incorporating these progression options and technique variations, you'll continue to challenge your muscles and make progress in your suspender self-assisted chest dip routine.
Now, let's explore different techniques to further enhance your workout.
Exploring Different Techniques
As you continue to progress in your suspender self-assisted chest dip routine, it's important to explore different techniques that can further enhance your workout and challenge your muscles.
One technique you can try is increasing the range of motion by lowering yourself deeper into the dip. This will engage your chest, triceps, and shoulder muscles more effectively.
Another option is to add weight to your routine by wearing a weighted vest or holding a dumbbell between your feet. This will increase the resistance and intensity of the exercise, leading to greater muscle activation.
To maximize your results, it's recommended to perform 3-4 sets of 8-12 reps, with a rest period of 1-2 minutes between sets.
Remember to always listen to your body and adjust the technique according to your fitness level and goals.
Common Mistakes to Avoid
To avoid common mistakes, you should focus on maintaining proper form and engaging your core during the Suspender Self Assisted Chest Dip exercise. By paying attention to your technique, you can ensure that you're getting the most out of this exercise and minimizing the risk of injury.
Here are some technique tips to help you perform the exercise correctly:
- Keep your shoulders down and back: It's common to hunch your shoulders during this exercise, but keeping them down and back will engage your chest muscles more effectively.
- Engage your core: Your core muscles play a crucial role in stabilizing your body during the dip. Make sure to engage your abs and keep them tight throughout the movement.
- Control your descent: Avoid dropping down too quickly during the dip. Instead, focus on a slow and controlled descent, allowing your chest muscles to engage fully.
Frequently Asked Questions
How Many Calories Can Be Burned by Doing Suspender Self Assisted Chest Dip?
When you do a suspender self-assisted chest dip, you can burn a significant number of calories. This exercise targets your chest, triceps, and shoulders, helping you build strength and muscle tone.
The more challenging the exercise, the more calories you'll burn. By incorporating this move into your workout routine, you can increase your calorie burn and enjoy the benefits of improved upper body strength and definition.
Can Suspender Self Assisted Chest Dip Help in Reducing Chest Fat?
Suspender self-assisted chest dips can definitely help in reducing chest fat. By engaging the muscles in your chest, shoulders, and arms, these exercises can promote overall upper body strength.
The key is to perform chest dips with proper form and control. To modify this exercise for different fitness levels, you can adjust the amount of assistance provided by the suspenders.
Keep practicing and gradually increase the intensity to achieve your desired results.
Is This Exercise Suitable for Beginners or Only for Advanced Level Trainers?
This exercise is suitable for beginners as well as advanced level trainers. If you're a beginner, there are modifications you can make to make it easier. Alternatively, there are other exercises you can try that target the chest muscles.
It's important to start with proper form and gradually increase the intensity as you get stronger. Always listen to your body and consult with a professional if you have any concerns.
Can Suspender Self Assisted Chest Dip Be Performed Without Using Suspenders?
Yes, you can perform the suspender self-assisted chest dip without using suspenders.
There are alternative ways to do this exercise. For beginners, you can use a resistance band or a chair to assist you in the movement.
These modifications can help you build strength and work your chest muscles effectively.
Remember to maintain proper form and gradually increase the difficulty as you progress.
Are There Any Specific Breathing Techniques to Follow While Doing This Exercise?
When doing the Suspender Self Assisted Chest Dip, it's important to pay attention to your breathing. Take a deep breath in as you lower yourself down, and exhale as you push back up. This will help you maintain control and proper form throughout the exercise.
Conclusion
In conclusion, the suspender self-assisted chest dip is a beneficial exercise for females looking to strengthen their chest muscles.
By properly setting up the equipment and following the step-by-step guide, you can perform this exercise with correct form and technique.
It's important to avoid common mistakes and consider progression and variation options to continue challenging yourself.
Overall, this exercise can help you improve your upper body strength and achieve your fitness goals.

Author
Years ago, the spark of my life’s passion ignited in my mind the moment I stepped into the local gym for the first time. The inaugural bead of perspiration, the initial endeavor, the very first surge of endorphins, and a sense of pride that washed over me post-workout marked the beginning of my deep-seated interest in strength sports, fitness, and sports nutrition. This very curiosity blossomed rapidly into a profound fascination, propelling me to earn a Master’s degree in Physical Education from the Academy of Physical Education in Krakow, followed by a Sports Manager diploma from the Jagiellonian University. My journey of growth led me to gain more specialized qualifications, such as being a certified personal trainer with a focus on sports dietetics, a lifeguard, and an instructor for wellness and corrective gymnastics. Theoretical knowledge paired seamlessly with practical experience, reinforcing my belief that the transformation of individuals under my guidance was also a reflection of my personal growth. This belief holds true even today. Each day, I strive to push the boundaries and explore new realms. These realms gently elevate me to greater heights. The unique combination of passion for my field and the continuous quest for growth fuels my drive to break new ground.


